
Vegan Peppermint Cream Pie - a rich gluten free chocolate crust paired with a luscious creamy mint filling. Best eaten topped with copious amounts of coconut whip.
Growing up, I had the strangest Birthday Cake request – Peppermint Cream Pie. To put the strangeness of this cakeless birthday request in perspective, my birthday is smack dab in the middle of the summer.
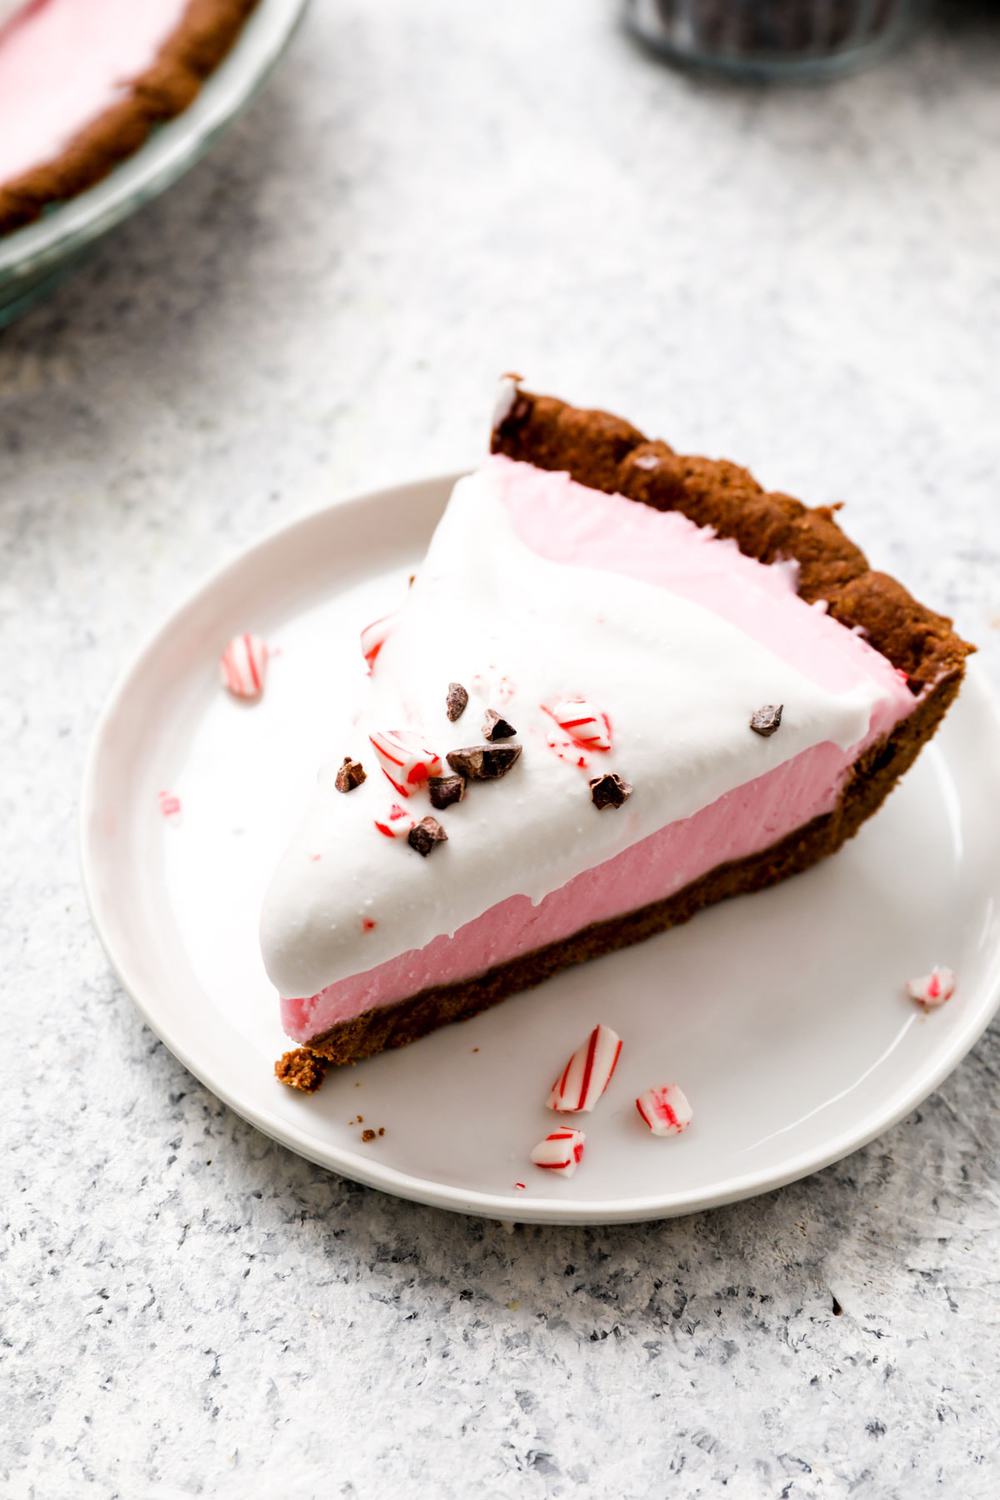
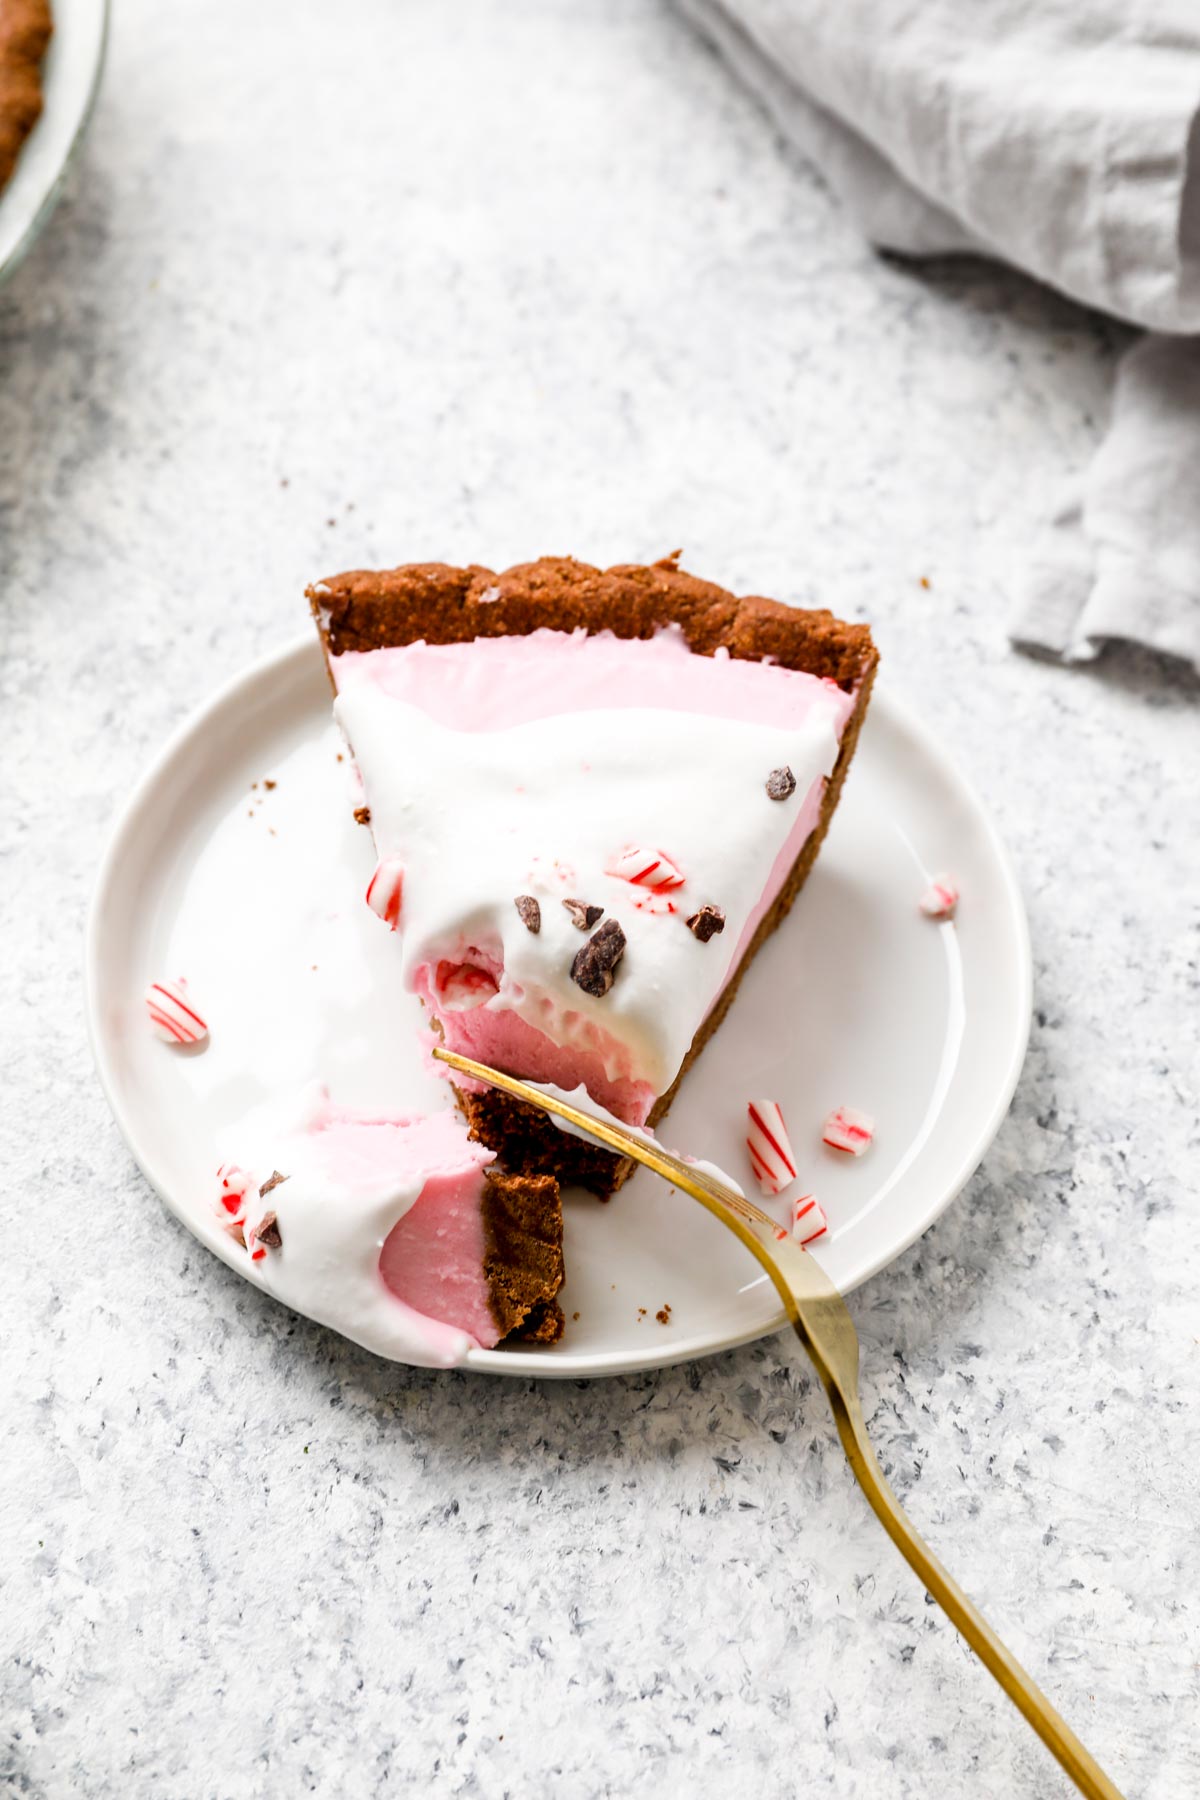
But the deep chocolaty oreo crust paired with the cool, creamy, and rich pink peppermint filling and oodles of whipped cream was my favorite dessert of all time. And the only thing I wanted to eat on my birthday. Year after year.
And while my adult self grew to appreciate cake, and healthier desserts, in general, I never forgot the Peppermint Cream Pie of yesteryear. But, I sincerely thought it too difficult to recreate that nostalgic pie. Until now.
How to make gluten free oreo pie crust:
What makes this pie is the combination of the rich chocolate crust with the minty filling. The flavor combo is magical.
While oreos don’t fit into my current dietary needs, we can make an oreo-less crust that is just as rich and chocolaty.
The crust is made with cacao powder for that rich chocolate kick, almond and oat flour to keep things gluten free, and a big pinch of salt to bring out all that chocolate flavor. A little dairy free butter and maple syrup bring this crust together.
Stir it in a bowl and press it into your pie pan. She is ready for a bake in the oven and then needs to cool before being filled. This ensures the crust stays crisp and tender when we pour in the filling.

How to make vegan peppermint cream pie filling:
Now onto the filling while the crust cools.
It is a luscious duo of a coconut milk custard that gets combined with coconut whipped cream for an airy peppermint packed filling that is both rich and light and fluffy at the same time.
To make the custard you will add coconut milk, sugar, and corn starch to a pot and cool over medium heat until it thickens up. Stir in some peppermint extract and optional natural food coloring. Place this in the fridge to cool.
Whip up a can of coconut cream into coconut whip (the best guide to make this is here), and fold that into the peppermint custard. Pour into the pie crust and place it in the fridge for 2-4 hours to set up.
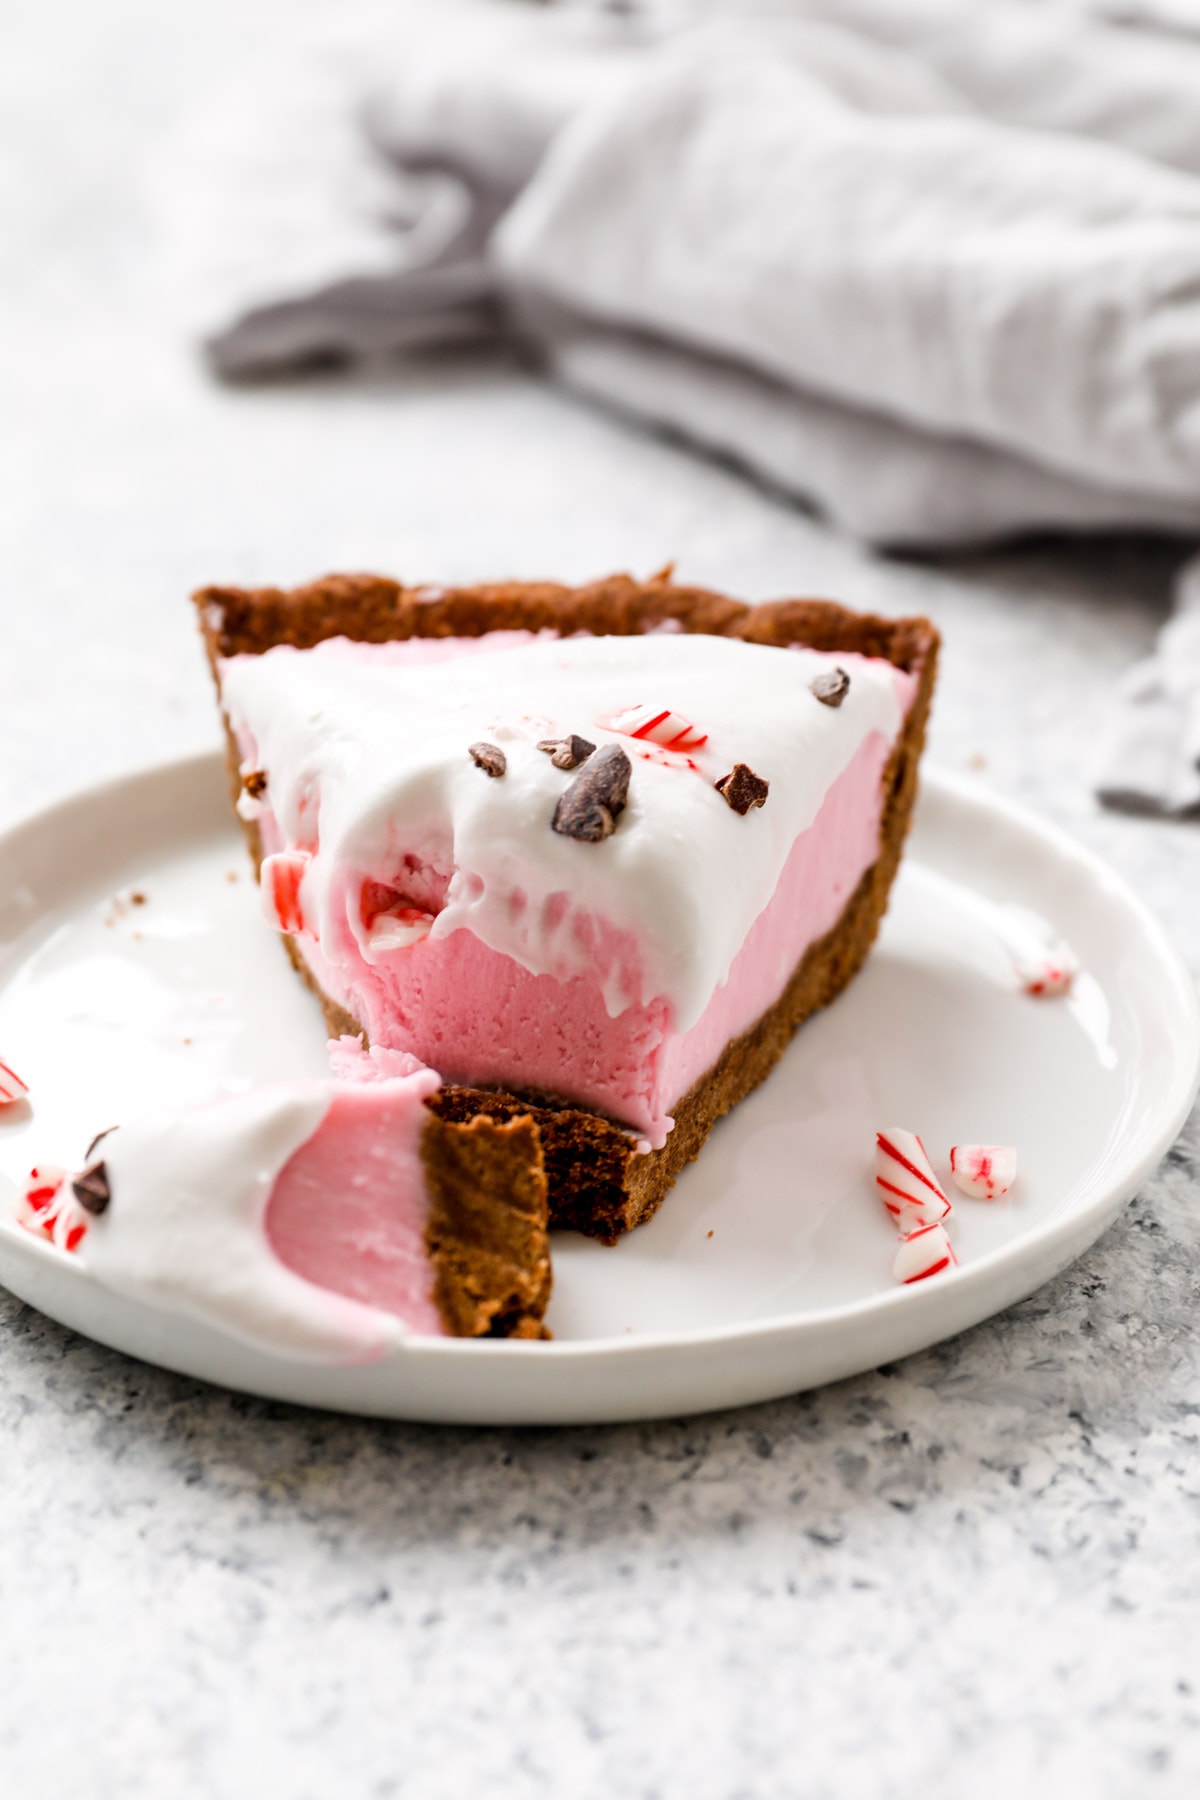
Bake off the crust, pour in the filling, and place the pie in the fridge to set. Top with whipped cream and crushed candy canes. You are looking down the barrel of one very delicious Christmas (or birthday) dessert.

Vegan Peppermint Cream Pie
- Prep Time: 10 minutes
- Cook Time: 6 hours
- Total Time: 6 hours 10 minutes
- Yield: 8 servings 1x
- Category: Dessert
- Method: Stovetop
- Cuisine: American
Description
Vegan Peppermint Cream Pie - a rich gluten free chocolate crust paired with a luscious creamy mint filling. Best eaten topped with copious amounts of coconut whip.
Ingredients
For the crust:
- 1 cup almond meal
- ¾ cup oat flour
- ¼ cup cacao powder
- ⅓ cup melted vegan butter
- 2 tablespoons maple syrup
- ¼ teaspoon salt
- For the filling:
- 3 (15) oz cans full fat coconut milk (two cans chilled in the fridge overnight)
- ½ cup sugar
- ¼ cup corn starch
- ½ teaspoon peppermint extract
Crushed candy canes and cacao nibs for garnish (optional)
Instructions
Before getting started, make sure to chill 2 cans of coconut milk in the fridge overnight.
For the crust:
- Preheat the oven to 350 degrees.
- In a bowl, stir together all of the crust ingredients until well combined.
- Pour into your pie dish and press it into the sides and bottom of the pan to create a compact even layer.
- Bake for 22 minutes. Remove and place on a wire rack to cool.
For the filling:
- Add the corn starch and ¼ cup of the room temperature coconut milk into a sauce pan and whisk until there are no lumps.
- Add in the remaining room temperature coconut milk and sugar into the pan. Heat over medium, stirring constantly, until the mixture starts to simmer and thicken. You will know its done when the mixture is jiggly and you can see ribbons form when you drizzle the spoon over the top of the mixture. Remove from the heat and stir in the peppermint extract.
- Pour the custard into a bowl and cover with plastic wrap, placing the wrap directly onto the custard to keep it from forming a skin. Transfer to the fridge to cool and set, about 4 hours.
- Next, grab one chilled can of coconut milk and without shaking, open the can. Scoop out the thick cream on top and place it in a bowl. Avoid any liquid, just use the thick cream. Using a hand mixer, whip the coconut cream into soft peaks. Place in the fridge to set for 4 hours while the custard is chilling.
- Once the custard has set and is cool, fold in ⅓ of the coconut whipped cream.
- Add in the remaining whip and fold until combined. Pour into the pie crust and place back in the fridge for 2 more hours.
- While the pie is setting up in the fridge, whip up the last can of chilled coconut milk into whipped coconut cream like in the previous step. Cover and place in the fridge to chill.
- When ready to serve, top the pie with coconut whipped cream and garnish with crushed candy canes and cacao nibs, if using. Slice and enjoy!
Notes
This is the best guide for how to make perfect coconut whipped cream!
You can use the remaining coconut water for smoothies or drinking.
Nutrition
- Serving Size: ⅛th pie
- Calories: 422
- Sugar: 16g
- Sodium: 90mg
- Fat: 37g
- Saturated Fat: 31g
- Carbohydrates: 28g
- Fiber: 3g
- Protein: 5g

When do you add the peppermint extract? Is it with the sugar?
Hi Liz, that is the correct timing. I updated the recipe card to include this information as well! Thanks for catching this missed direction!
The ingredients state coconut milk however the recipe says coconut cream
Hi Katrina, it should say coconut milk in the instructions too. A typo on our part! I just updated the recipe to provide clearer instructions. You us chilled coconut milk, but then scoop out the coconut cream from the top of the chilled can. Happy baking!
Hi! Would this pie do well in the fridge for a few days or does it need to be made the day of?
Hi Hayley! It should keep in the fridge for a day or two :)
Did you add food colouring to the filling to get that colour?
Hi Cat! Yes, I used a few drops of red natural food coloring.