
A step by step guide to make the best homemade Gluten Free Pizza Dough! This crust recipe is chewy, crispy, and soft. Surprisingly easy to make!
Pizza.... mmmmmmm. One of the best foods on the planet. It has stringy gooey cheese, a bright and complex sauce, and the foundation of it all, a good pizza crust.
And a good pizza crust is essential to a good pizza. And you can kiss the days of tolerating soggy, bready, crumbly, and chalky pizza crusts goodbye! This Gluten Free Pizza Dough is soft, chewy, and crispy around the edges. It is sturdy enough to stand up to a pile of toppings and has a mild flavor that lets the toppings really shine!
Ready to dive headfirst into a slice of pie? Let's get started on that dough!

How to make pizza dough:
1: Gather and measure your ingredients
The road to perfect homemade Gluten Free Pizza Crust starts with good prep work. That way you are ready to rock and roll when the recipe gets going. Gather all your ingredients and measure them out.
2: Bloom the yeast
Heat your water to 110 degrees, and no warmer, or it will kill the yeast.
Then whisk in the honey or maple syrup into the water. The sugars in the honey will "feed" the yeast causing it to activate and bloom.
After 10 minutes your mixture should have a creamy foam on top of the water (aka the "bloom"). This means that your yeast is activated and ready to go!
If your yeast didn't bloom, discard the mixture and try again. If it doesn't bloom the second time around, your yeast is dead and will need to be replaced before moving on with the rest of the recipe.

3: Mix and let rise
Now that your yeast is ready to go, you'll mix everything together until you have a wet dough.
It won't be kneadable like regular pizza dough, but stick with me here. The extra water in the dough is necessary for achieving a soft and pliable gluten free pizza dough.
Place the dough in an oiled bowl to prevent sticking, cover him with a towel, and place him in a warm, draft-free zone, to rise. After one hour, your dough should have doubled in size and look puffy.
Now transfer it to the fridge for another hour so that that sticky dough can firm up enough to handle. Now is a good time to preheat your oven. If you are using a pizza stone, place it in the oven on the lowest rack. Pizza is on the horizon!
[one-half-first]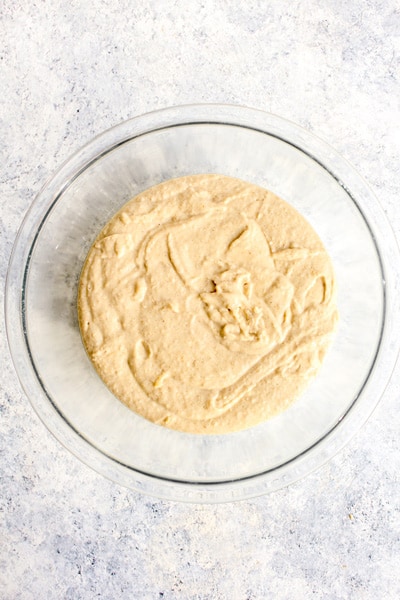 [/one-half-first][one-half]
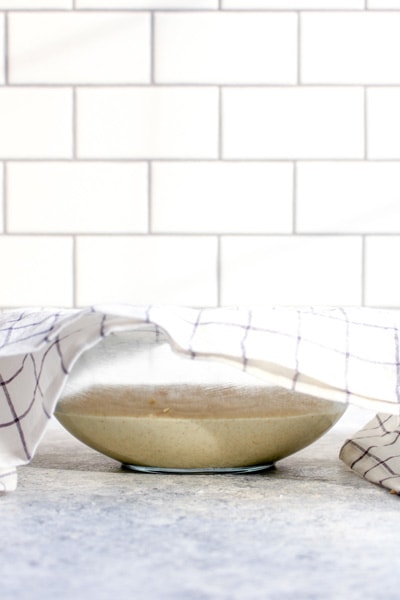 [/one-half]
[one-half-first]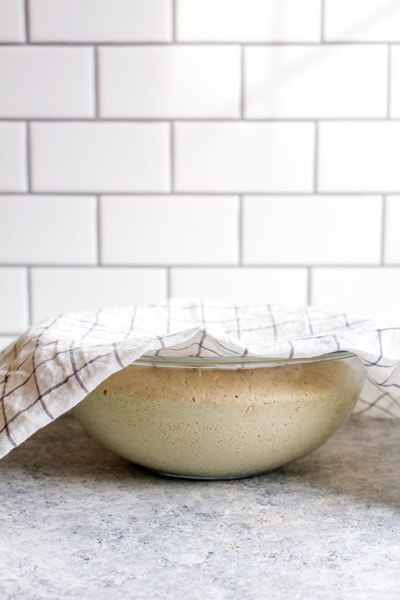 [/one-half-first]
[one-half]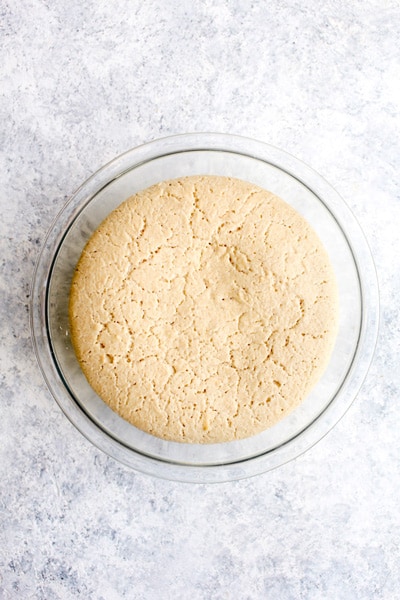 [/one-half]
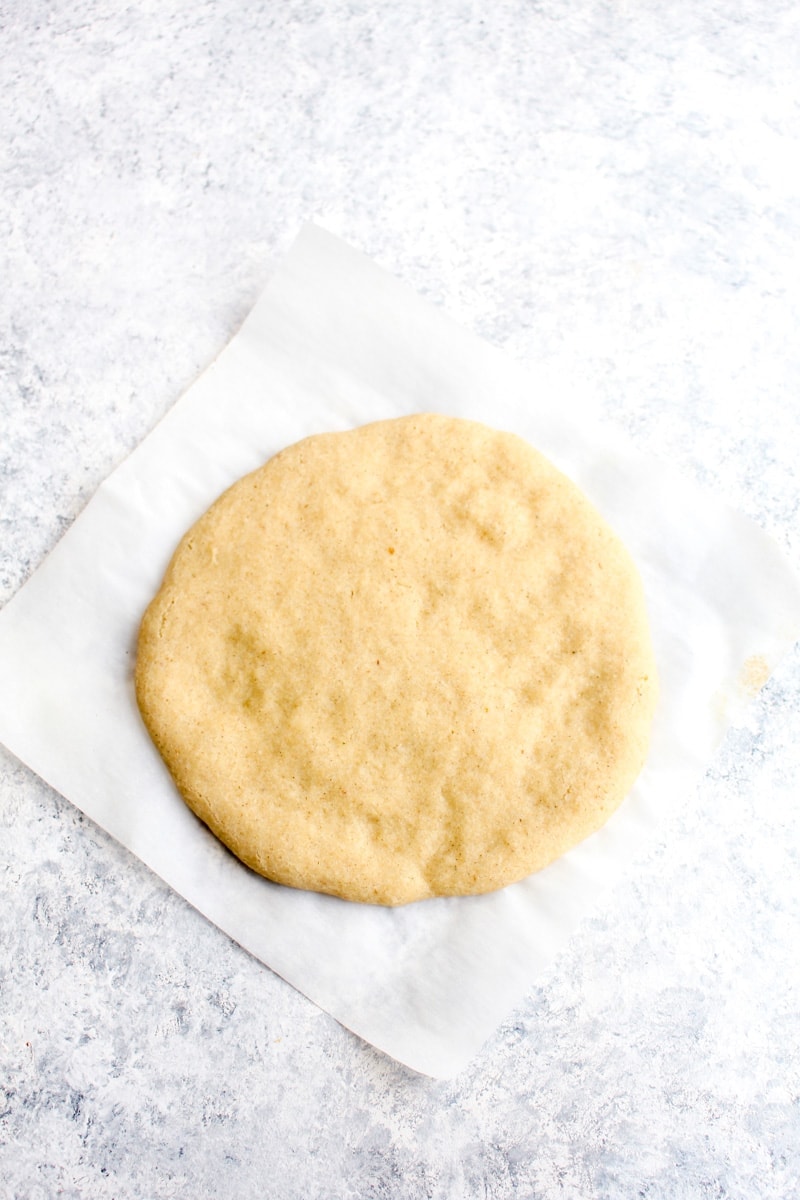
4: Form the dough
The gluten free pizza dough has had time to chill and hopefully so have you. Now grab that bowl out of the oven and get ready to make pizza magic.
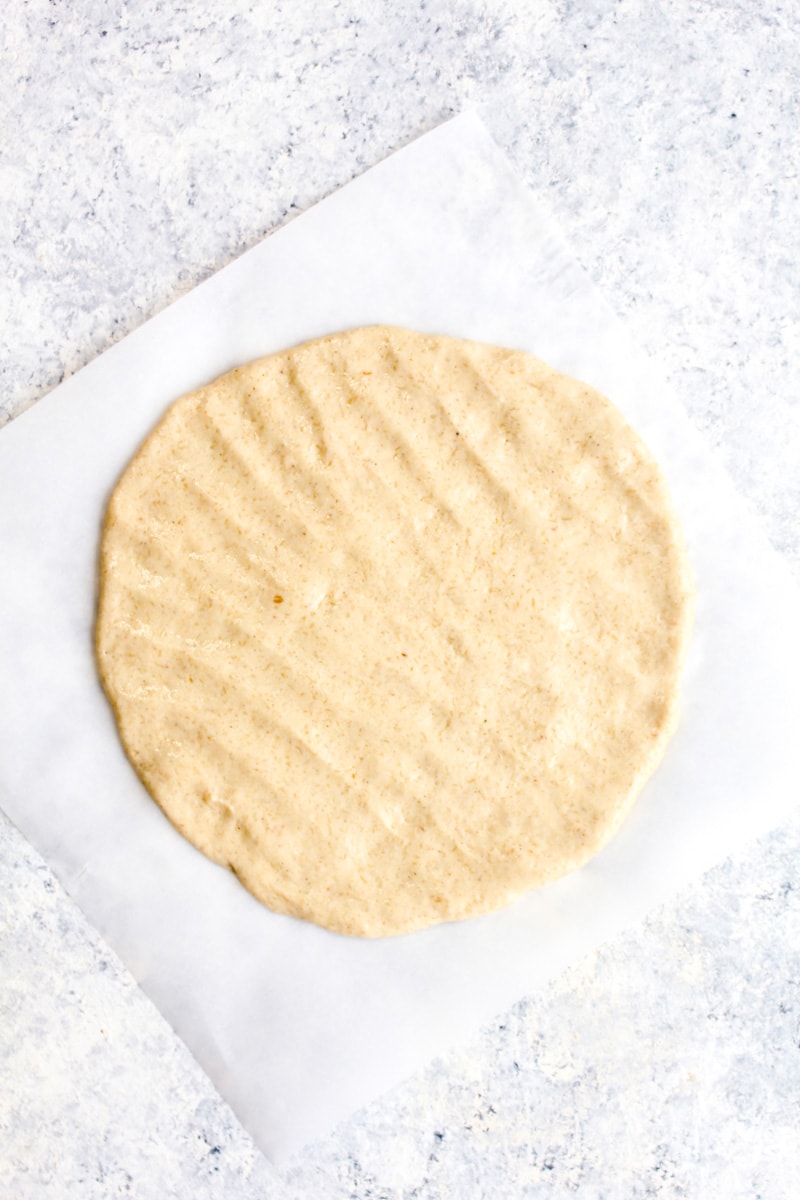
Divide the dough into four even balls. I usually draw an X in dough with my hands to separate it into four pieces.
Place one of the dough rounds onto a piece of parchment paper. Using your hands, gently pat the dough out into a circle that is about 9-12 inches in diameter. Keep in mind that this dough really puffs up in the oven. So, the dough will roughly double in height. The thinner the dough, the crispier the crust.
Having trouble with the dough sticking to your hands? Wash and dry your hands, then spray them with a quick mist of nonstick cooking spray.
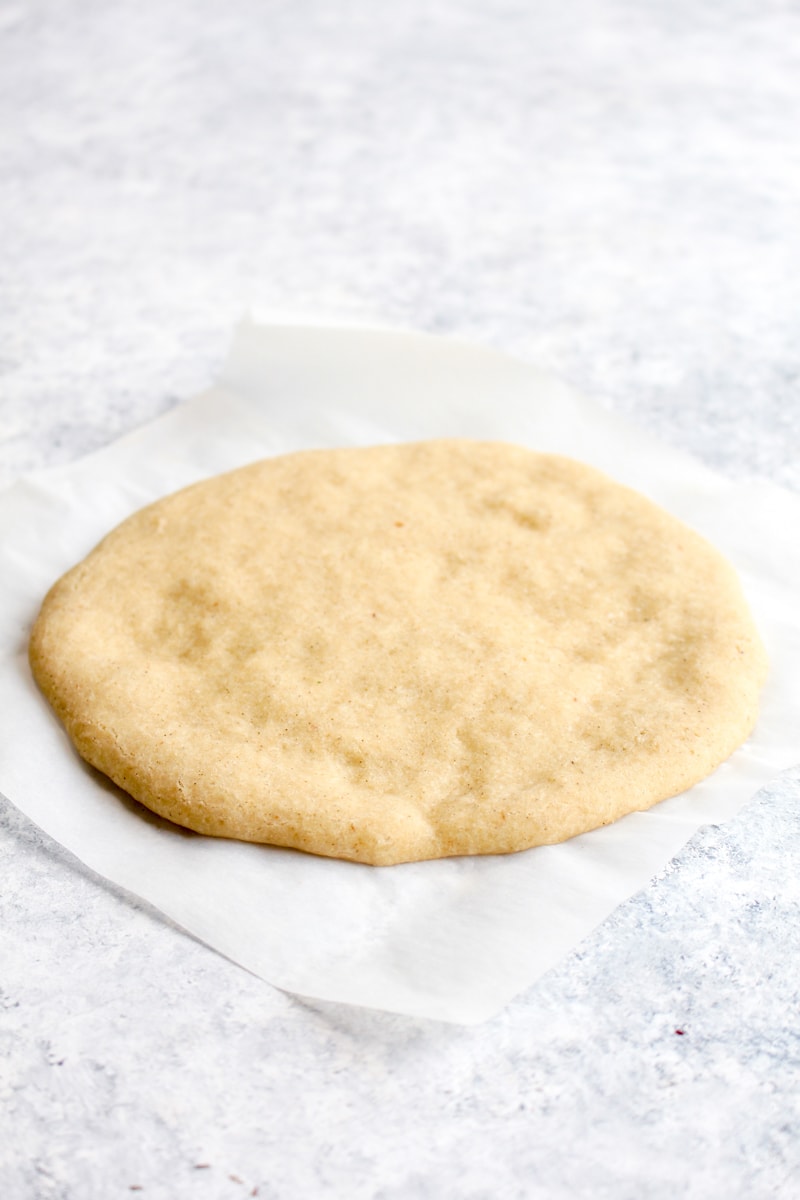
5: Par bake the crusts
If you are using a pizza stone:
Transfer the crust, including the parchment, onto a pizza peel. Use the pizza peel to transfer the crust into the oven, directly on top of the stone. Bake for 3-5 minutes or until the crust is set and no longer doughy to the touch, but is not yet browned. Remove the crust from the oven using the pizza peel. Peel off the parchment paper and place the crust on a cooling rack while you par bake the remaining crusts. Placing them on the rack keeps the crusts from getting soggy and soft.
If you are using a baking sheet:
Start by placing the baking sheet into the oven on the middle rack. Let the baking sheet preheat in the oven for 10 minutes. Remove the baking sheet from the oven, quickly transfer a crust, with the parchment, onto the baking sheet and place it back into the oven. Bake for 3-5 minutes or until the crust is set and no longer doughy to the touch, but is not yet browned. Remove the crust from the oven. Peel off the parchment paper and place the crust on a cooling rack while you par bake the remaining crusts. Placing them on the rack keeps the crusts from getting soggy and soft.
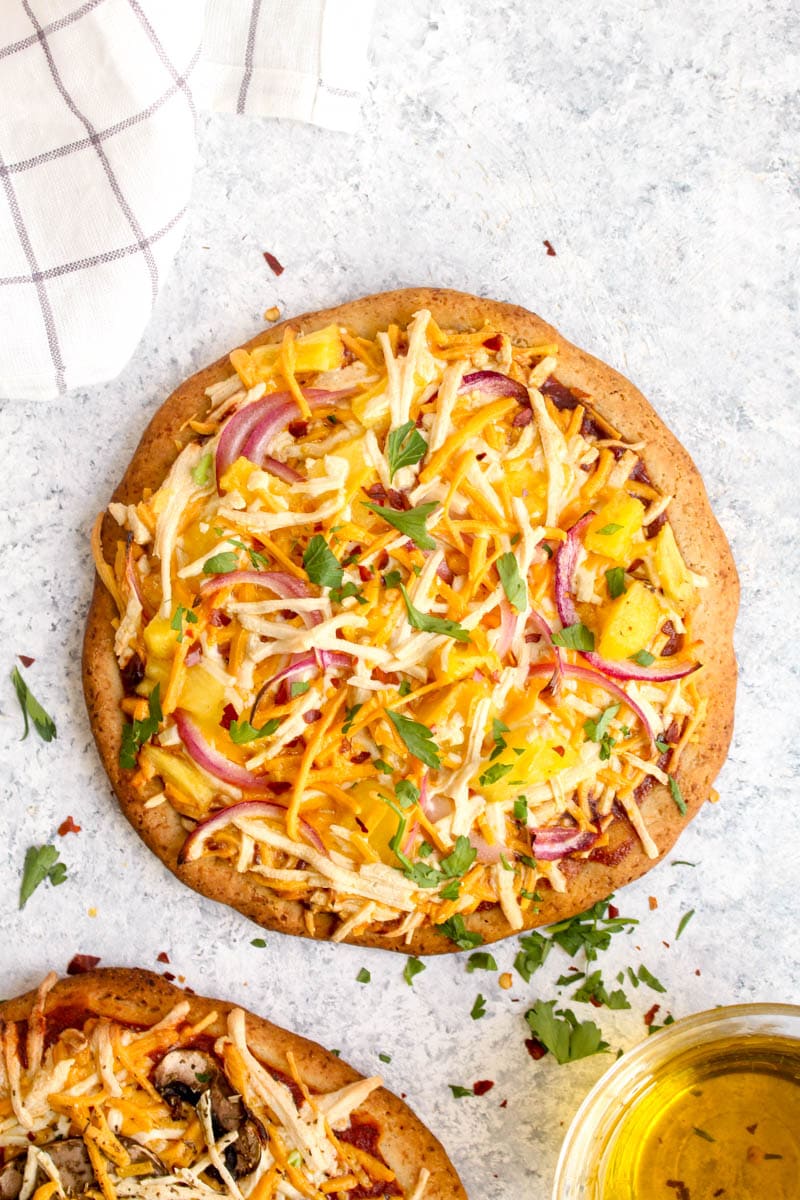
6: Top and warm through
Once your crusts are baked, top them with sauce, cheese, and toppings of your choice. Return the pizza directly to the oven rack - not onto the stone or the sheet pan. Bake until the cheese is bubbly and the crust is cooked through, about 10-20 minutes. Remove from the oven and let the pizza cool for a couple of minutes before slicing.
Step 7: Slice and ENJOY
You know what to do here...
Tools you will need in order to make perfect Gluten Free Pizza Crust:
- Kitchen thermometer
- Stand mixer
- Parchment paper
- Pizza stone or baking sheet
- Pizza peel (optional for use with the stone)
- Cooling rack
Ingredients you'll need to make perfect Gluten Free Pizza Crust:
(P.S. These are exactly what I used when testing and making my crust.)
- Honey or maple syrup
- Active dry yeast
- Sorghum flour
- Garbanzo bean flour (also called chickpea flour)
- Potato starch
- Arrowroot starch
- Salt
- Psyllium husks
- Avocado oil
What to make with gluten free pizza dough:
- Your favorite pizza of course!
- Freezer Pizzas - 3 Ways!
- Garlic Knots
- Italian Herb Breadsticks
- Cinnamon Rolls

Gluten Free Pizza Dough
- Prep Time: 10
- Cook Time: 140
- Total Time: 2 hours 30 minutes
- Yield: 4 personal sized crusts 1x
- Category: Entree
- Method: Oven
- Cuisine: Italian
- Diet: Gluten Free
Description
A step by step guide to make the best homemade Gluten Free Pizza Dough! This crust recipe is chewy, crispy, and soft. Surprisingly easy to make!
Ingredients
To bloom the yeast:
- 1 ¼ cups filtered water
- 2 tablespoons honey OR maple syrup
- 1 tablespoon active dry yeast
Dry ingredients:
- ½ cup garbanzo bean flour
- 1 ½ cups sorghum flour
- ½ cup potato starch
- ½ cup arrowroot starch
- 1 teaspoon salt
Wet ingredients:
- 1 ½ tablespoons psyllium husks
- 3 tablespoons oil
Instructions
Bloom the yeast: Heat your water to 110 degrees, and no warmer or it will kill the yeast. Whisk in the honey until dissolved. Add in the yeast and whisk well. Set aside for 10 minutes to bloom. After 10 minutes your mixture should have a creamy foam on top of the water. This means that your yeast is activated and ready to go! If your yeast didn't bloom, discard the mixture and try again. If it doesn't bloom the second time, your yeast is dead and will need to be replaced before moving on with the rest of the recipe.
Mix the dry ingredients: While the yeast is blooming, whisk together the dry ingredients in a bowl and set aside.
Mix the wet ingredients: Add the yeast mixture to the base of a stand mixer fitted with the paddle attachment. Add in the psyllium husks and oil. Turn the mixer onto medium low and mix for 10-15 seconds to evenly distribute the ingredients. Since you are mixing oil and water, they won't combine perfectly, but this gets the stirring started.
Combine it all: Add half of the flour into the stand mixer. Turn it onto medium and mix until combined. Add in the remaining half and mix again. Scrape the sides and bottom of the bowl as necessary.
Let it rise: Coat a bowl with nonstick spray and pour in the dough. Cover with a clean towel or plastic wrap and place it in a warm, draft free place to rise for 1 hour. The dough should double in size.
Time to chill: Transfer it to the refrigerator and let it rest for 1 hour. This makes the dough much much easier to handle and form into round crusts. While the dough chills, preheat the oven to 425 degrees.
Form the crusts: Remove the dough from the fridge and divide it onto four even pieces. Grab a sheet of parchment paper and place the first piece of dough in the center. Using your hands, pat it out into a circle, roughly 9-12 inches in diameter. Keep in mind that the dough puffs up a lot in the oven. The thinner the crust, the crispier it will be. The thicker the crust, the more bread-like it will be. If the dough is sticking to your hands, spray them with nonstick spray.
Par bake the crusts:
- If you are using a baking stone, place the crust and parchment paper onto a pizza peel. Use the peel to transfer the crust to the stone. Bake for 3-5 minutes, or until the crust is set and no longer wet and doughy. Repeat with the remaining crusts.
- If you do not have a baking stone, place a baking sheet in the oven to heat up for 10 minutes. Carefully remove the baking sheet from the oven and quickly slide the crust and parchment paper onto the baking sheet. Return to the oven and bake for 3-5 minutes, or until the crust is set and no longer wet and doughy. Repeat with the remaining crusts.
Top and bake: Top each par baked crust with sauce and toppings of choice. Return to the oven, this time placing the crust right onto the rack, for 10-20 minutes or until the crust is golden and the cheese is bubbly. Cut and enjoy!
Nutrition
- Serving Size: 1 crust
- Calories: 354
- Sugar: 9g
- Sodium: 614mg
- Fat: 11g
- Saturated Fat: 1g
- Carbohydrates: 70g
- Fiber: 12g
- Protein: 1g

Do I have to use yeast? Is there a substitute for chickpea flour?
Hi Mary, Yes, you will need to use both yeast and chickpea flour to get the recipe to work properly. The yeast creates a light dough, and without it the crust will be very tough and dense. The chickpea flour helps the dough to rise properly. I order both on Amazon or pick them up at my local health food store. If you are looking for a crust that doesn't need yeast, I often use the crust from this recipe (though it does use chickpea flour). Happy baking!