
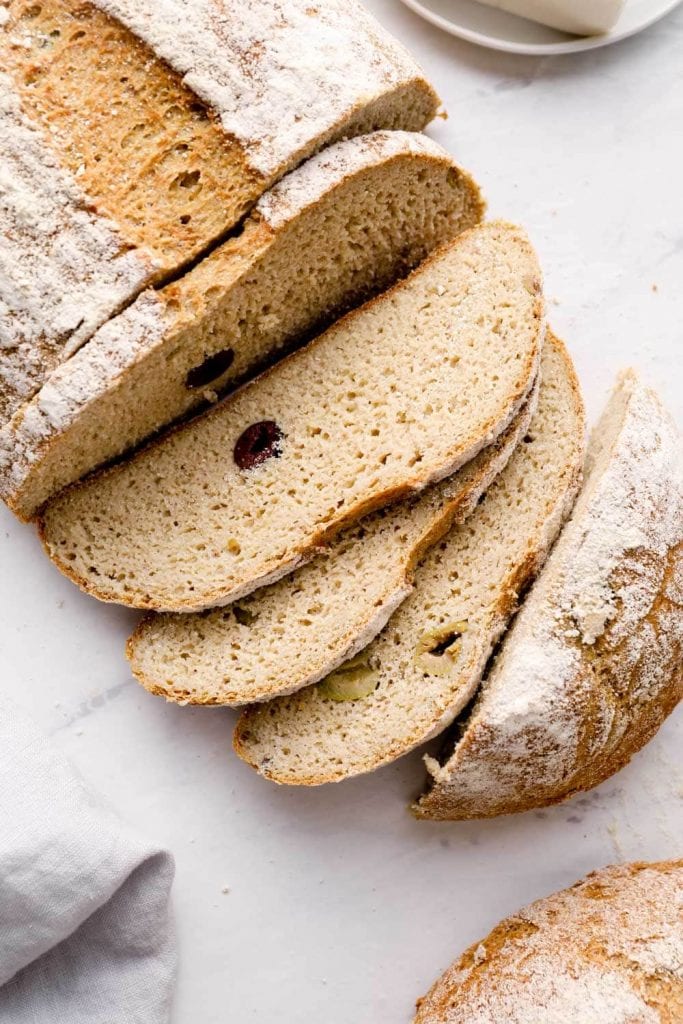
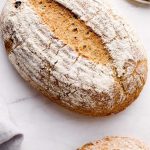
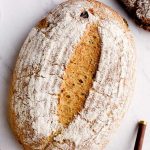
Gluten Free Olive Bread with chewy crust, soft interior, and salty olives. Whole grain and vegan adaptable!

Gluten free olive bread is a favorite spinoff from my Artisan Gluten Free Bread recipe. It has the same richly browned chewy crust, soft and fluffy interior and sweet and nutty, whole wheat-like flavor. But this loaf is studded with salty olives!
It's perfect for toast and sandwiches, with soup, and for snacking by the generously buttered slice.
Reasons to love this recipe!
- Made with 100% whole grains!
- Required just 8 ingredients and a few minutes of hands on time.
- Looks like an artisan bakery loaf, but minus the gluten!
- Can easily be made vegan.
Ingredients you'll need:
- Sorghum flour - make sure all flours are certified gluten free!
- Brown rice flour
- Oat flour
- Quinoa flour
- Warm water - between 105 and 110 degreed fahrenheit. I like to use this digital thermometer to make sure I get the temperature right.
- Maple syrup or honey - use maple syrup for vegans
- Active dry yeast - I buy it in bulk and store it in my freezer
- Psyllium husks - in their whole form, not powder. They give the bread an incredible texture and chew.
- Olives - a mix of 2-3 olives gives the best flavor! Kalamata, manzanilla, chalkidiki, castelvetrano, and niçoise are all great options! Pick what looks good. Choose from the olive bar if you can, and make sure they are pitted.

How to make gluten free olive bread:
Mix the dry ingredients: I usually mix them together right in my stand mixer.
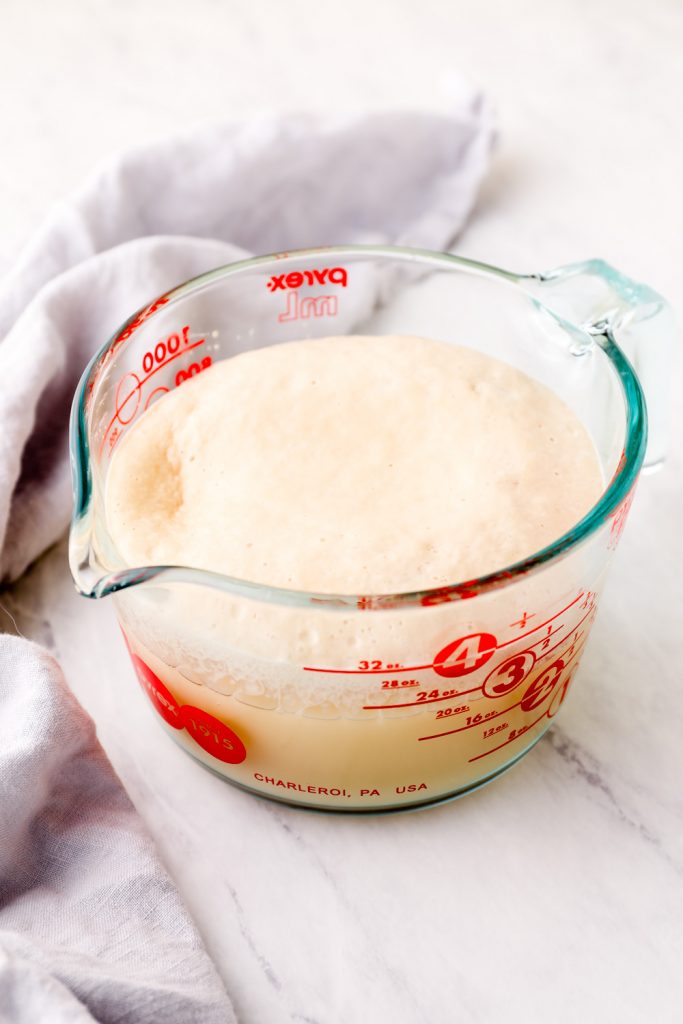
Bloom the yeast: Then, stir together the warm water, yeast, and honey or maple syrup. Set this aside for 10 minutes. The yeast should get nice and frothy. The froth lets you know the yeast is active and ready to go. If your yeast doesn't froth after 10 minutes. Try one more time and make sure the water temperature is correct. If it still doesn't froth, your yeast has expired. You'll need to get a fresh batch before making this recipe.
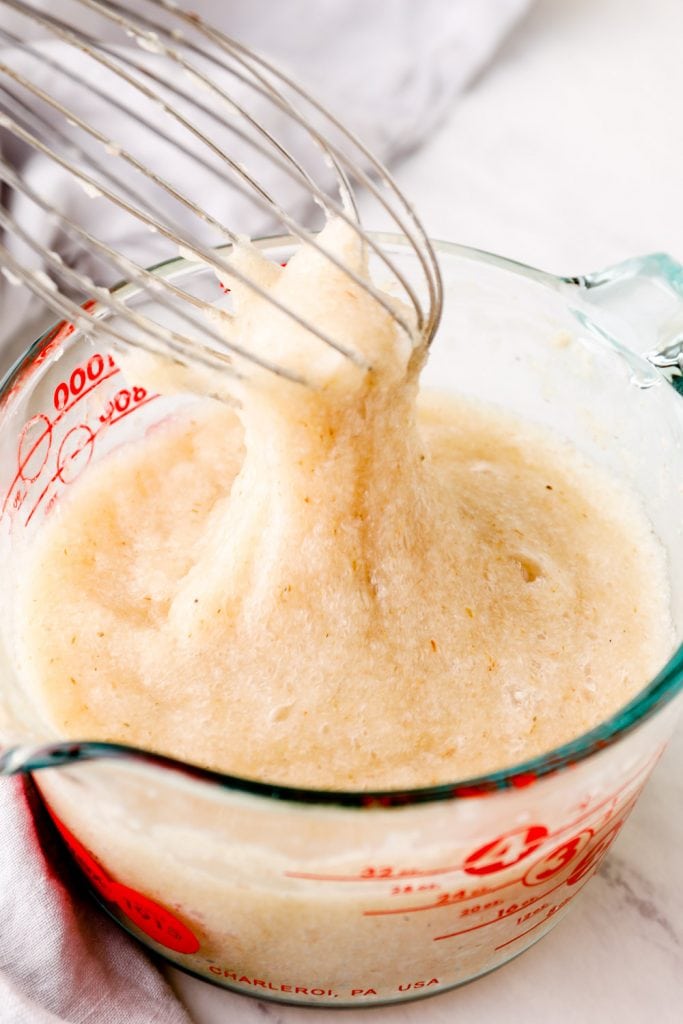
Gel the psyllium husks: Stir in the psyllium husks and set aside for another 5. They will thicken and create a gel-like consistancy.
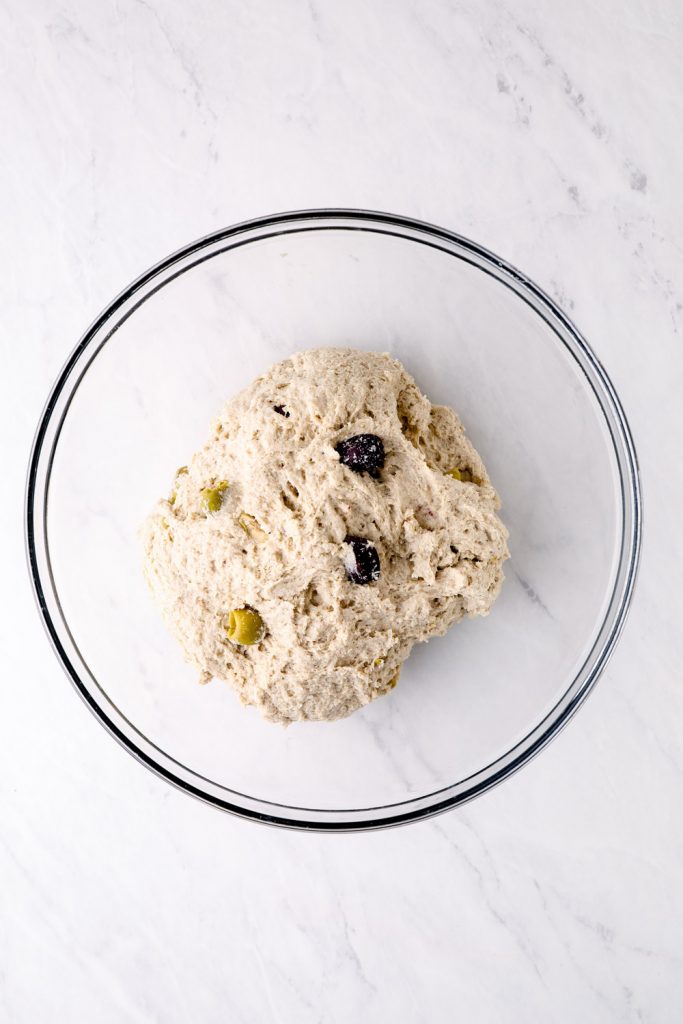
Mix and rise #1: Add the wet ingredients into the dry and mix on medium speed until combined. Shape the dough into a ball, place in an oiled bowl, cover with a tea towel, and let rise for 1 hour.
Preheat and prep the oven: If you have one, place a baking stone on the lower rack. The stone helps maintain an even oven temperature and a more even bake on the bread. On top of the stone, place a cast iron or baking dish. Preheat the oven to 400 degrees.
Rise #2: Once risen, kneed the dough, form into a ball again, and place in a proofing basket. Let rise for another 45 minutes. Alternatively, you could let the bread rise again in the same bowl, but the loaf will be shorter and squatter. The proofing basket helps create a tall, well shaped, loaf - and they are super affordable!

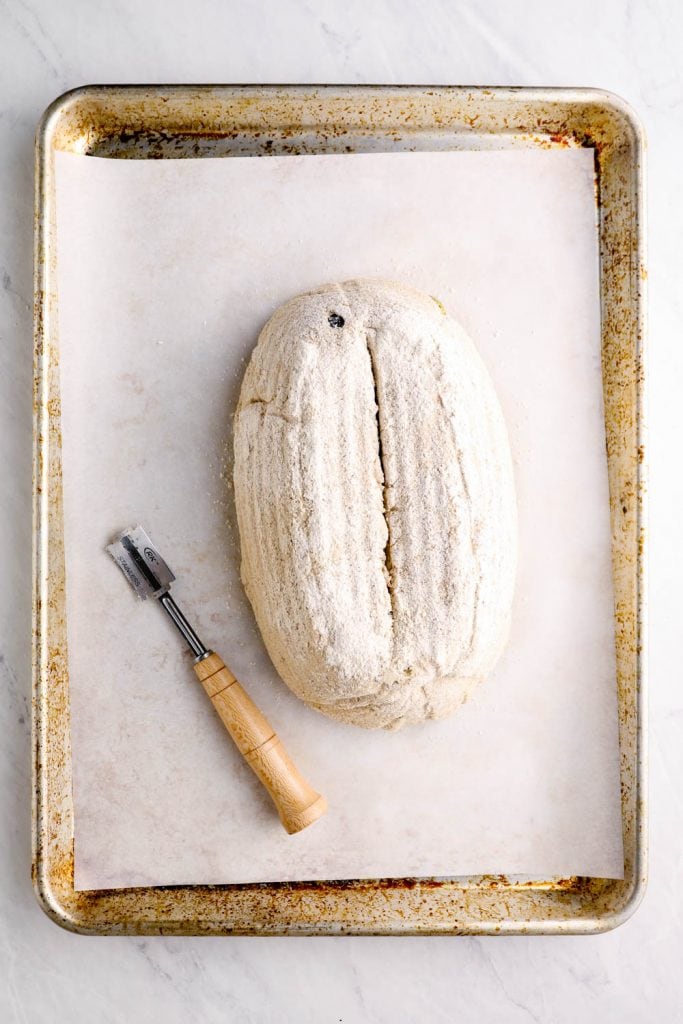
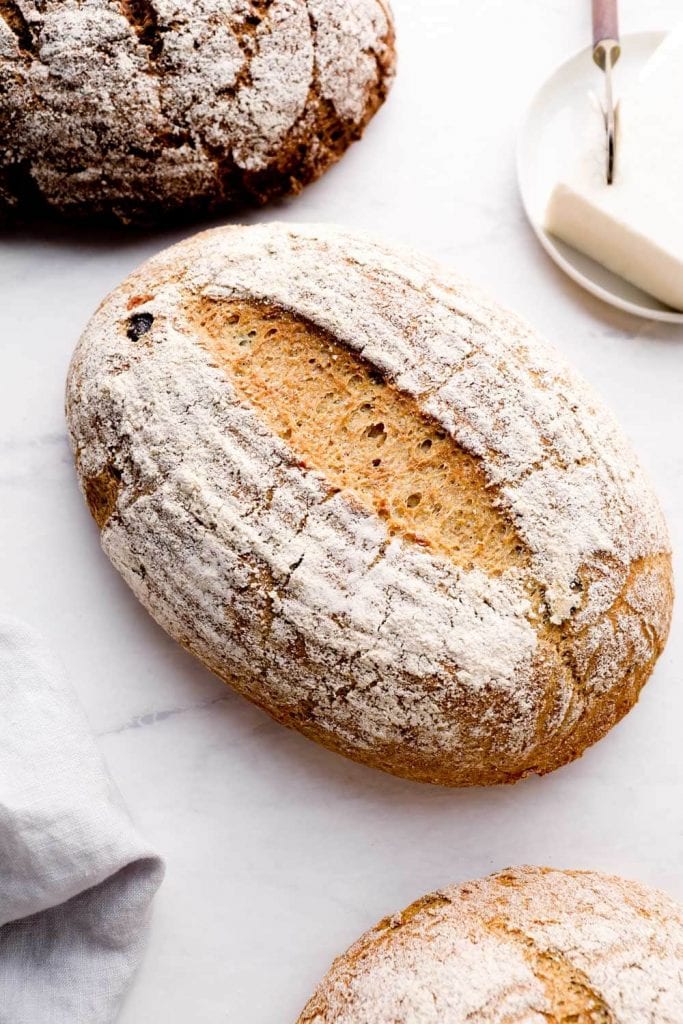
Bake: Gently tip the dough onto a sheet pan. Score the top of the bread using a lame or very sharp knife. Fill a drinking glass with ice cubes and add them to the cast iron or baking dish. Quickly transfer the bread to the oven and bake for 55-65 minutes. Let cool completely on a wire rack. Enjoy!

Storage:
Store leftover bread in the counter in a linen bread bag for 3-4 days. You can also store it cut side down on a cutting board for 2-3 days.
For longer storage, slice and freeze for up to 3 months. Toast slices from frozen.
Is this olive bread vegan?
It can be! The only ingredient standing in the way of this being 100% vegan is honey.
Swap the honey for maple syrup, or even sugar, and your loaf will be vegan.
More gluten free bread tips?
Check out this Artisan Gluten Free Bread Post! It is PACKED with information and can answer all your questions from psyllium husks to baking without a stand mixer, to achieving the best crust.
More gluten free bread recipes:
- Artisan Gluten Free Bread
- Cinnamon Raisin Bread
- Italian Herb Breadsticks
- Pizza Crust
- Pumpkin Bread
- Cinnamon Rolls

Gluten Free Olive Bread
- Prep Time: 10 minutes
- Rise Time: 1 hour 45 minutes
- Cook Time: 50 minutes
- Total Time: 2 hours 45 minutes
- Yield: 12 slices 1x
- Category: Side
- Method: Oven
- Cuisine: American
- Diet: Gluten Free
Description
Gluten Free Olive Bread with chewy crust, soft interior, and salty olives. Whole grain and vegan adaptable!
Ingredients
Dry ingredients:
- 130 grams (1 cup) gluten free sorghum flour
- 125 grams (1 cup) gluten free brown rice flour
- 90 grams (1 cup) gluten-free oat flour
- 75 grams (½ cup) gluten free quinoa flour
- 6 grams (1 teaspoon) sea salt
Wet ingredients:
- 2 ½ cups warm water, between 105 and 110 degrees
- 10 grams (1 tablespoon) active dry yeast
- 2 tablespoons maple syrup OR honey
- 30 grams (½ cup) whole psyllium husks
Add-ins:
- ½ cup pitted olives
Instructions
- Whisk together all of the dry ingredients in the bowl of a stand mixer. Fit the mixer with the paddle attachment.
- In a bowl, whisk together the water, yeast, and maple syrup. Let sit for 10 minutes. The mixture should be frothy and smell of warm yeast. (If the mixture is not frothy, the yeast is expired and the bread will not rise. It is best to start over with a new batch of yeast.)
- Whisk in the psyllium husks, making sure there are no clumps. Allow this mixture to sit for 5 minutes, until thick.
- Add in the wet mixture to the dry. Mix on medium speed until well incorporated and the dough forms a loose ball. Stir in the olives with a spatula.
- Remove the dough from the mixer and kneed a few times on an oiled surface. The dough is very sticky, so you might find it helpful to oil your hands, too. Form the dough into a ball by tucking the sides underneath until it is round. Place in an oiled bowl, seam side down.
- Cover with a towel and let rise in a warm, even temperatures place for 45 minutes to an hour. The dough should double in size.
- Once the dough has risen, kneed a few times on an oiled surface. Once again, form the dough into a round ball, or oval (depending on your proofing basket), by tucking the edges underneath. Return to the bowl (or floured proofing basket), this time seam side up. Let rise for 30-45 minutes, or until the dough has doubled in size.
- While the dough is rising, place a cast iron skillet on the lower middle oven rack. Preheat the oven to 425 degrees. You want to let the oven preheat during the entire second rise. This ensures that the oven is at an even temperature when baking the loaves.
- After the second rise, line a baking sheet with parchment paper. Carefully tip the bread out onto the baking sheet. Using a sharp knife, make a few shallow cuts in the top of the bread.
- Add a cup of ice to the cast iron and immediately add the bread to the upper rack, and quickly shut the oven door. Bake for 50 minutes. Remove from the oven and let the bread cool completely on a wire rack, several hours, before slicing.
Notes
Bread stores well on the counter, wrapped in a towel or linen bread bag for 3 days. You can also slice and freeze the bread for up to 3 months. Toast the slices from frozen.
If you don't have a stand mixer, you can still make this recipe. Whisk the dry ingredients together in a large bowl. When you add in the liquid, stir it together with your hands, kneading as necessary to fully incorporate all the flour into the dough.
Nutrition
- Serving Size: 1 slice (1/12th recipe)
- Calories: 141
- Sugar: 2g
- Sodium: 198mg
- Fat: 2g
- Saturated Fat: 0g
- Carbohydrates: 29g
- Fiber: 4g
- Protein: 4g
- Cholesterol: 0mg


Good afternoon,
I was wondering if you can add in things like roasted tomatoes to this dough?
Hi Kate, I think that would be a great idea!